by Sanjana Shruti | Dec 28, 2022 | Uncategorized
Introduction
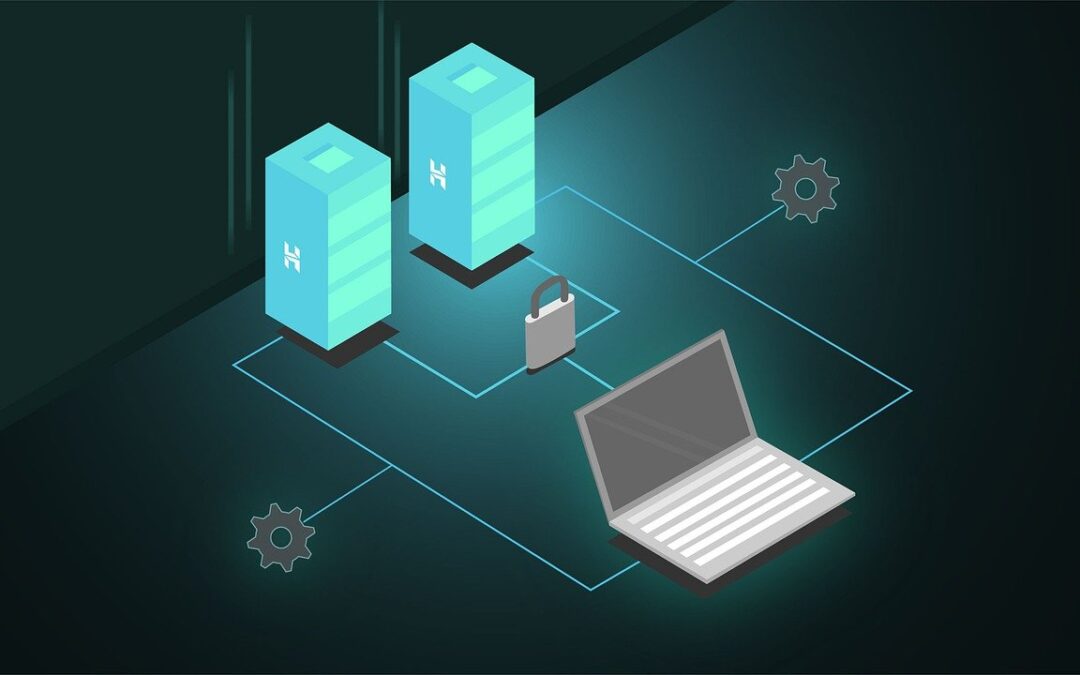
Long ago, being able to access equipment remotely became essential. Today, we can hardly picture life without remote computer control. Depending on the operating system you are using, there are numerous ways to connect to a remote machine, however the two most used protocols are:
- SSH (Secure Shell) for Linux-based computers
- RDP is the Remote Desktop Protocol for Windows-based computers.
The client and server program are used by the two protocols to create a remote connection. With these tools, you can connect to and control other computers remotely, transfer data, and perform nearly any task that can be carried out while physically in front of the computer
Prerequisites
There are a few prerequisites to fulfil before you can establish a secure remote desktop communication with a distant machine:
- The remote computer must always be on and connected to the internet.
- Installation and activation of the client and server program are required.
- You must know the distant computer’s IP address or name in order to connect to it.
- To access the remote computer, you must have the required permissions.
- The remote connection must be permitted by the firewall settings.
Describe SSH.
With the help of a text-based interface and the Secure Shell protocol, also known as Secure Socket Shell, you can safely connect to a server or remote computer.
A shell session will be launched once a secure SSH connection has been made, allowing you to issue commands from the client software on your local computer to control the server.
This protocol is most commonly used by system and network administrators, as well as anyone who needs to remotely administer a computer in a very secure way.
How Does SSH Function?
A client and the associated server-side component are required to establish an SSH connection. Installing an SSH client on your computer will enable you to connect to a server or another machine. If the credentials are validated, the client establishes the encrypted connection using the specified remote host information.
An SSH daemon is a server-side component that continuously monitors a particular TCP/IP port for potential client connection requests. The SSH daemon will respond with the software and protocol versions it supports once a client begins a connection, and the two will then share their identity information. If the credentials entered are accurate, SSH starts a fresh session for the proper environment.
Version 2 of the SSH protocol is the standard for communication between SSH servers and SSH clients.
Activating an SSH Connection
You must ensure that the client and server components are set up on the local and remote machines, respectively, in order to establish an SSH connection. OpenSSH is a popular SSH program that is open source and used with Linux distributions. OpenSSH may be easily installed. Both the machine you use for connecting and the server’s terminal must be accessible. Keep in mind that SSH server is not by default installed on Ubuntu.
Installing the OpenSSH Client
Make sure an SSH client is not already installed before continuing with the installation. An SSH client is already included in many Linux distributions. To connect to a server on a Windows system, instal PuTTY or another client of your choice.
You must: in order to determine whether the client is accessible on your Linux-based machine.
- Open an SSH window. You may either type “terminal” into your search engine or hit CTRL + ALT + T on your keyboard.
- Type in
ssh and press Enter in the terminal.
- If the client is set up, you will see a response similar to this.
username@host:~$ ssh usage: ssh [-1246AaCfGgKkMNnqsTtVvXxYy] [-b bind_address] [-c cipher_spec] [-D [bind_address:]port] [-E log_file] [-e escape_char] [-F configfile] [-I pkcs11] [-i identity_file] [-J [user@]host[:port]] [-L address] [-l login_name] [-m mac_spec] [-O ctl_cmd] [-o option] [-p port] [-Q query_option] [-R address] [-S ctl_path] [-W host:port] [-w local_tun[:remote_tun]] [user@]hostname [command] username@host:~$
This indicates that you are prepared to connect virtually or physically to a machine. In any other case, you must set up the OpenSSH client:
- To install the OpenSSH client on your PC, use the following command:
instal openssh-client with sudo apt-get
- When prompted, enter your superuser password.
If you have the required access rights and know the hostname or IP address of any machine that has the server-side programme on it, you can now SSH into that machine.
Installing an OpenSSH server:
A system has to have the server-side component of the SSH software toolkit in order to accept SSH connections.
Try connecting to the local host if you first want to see if the remote computer’s Ubuntu setup has an OpenSSH server that can accept SSH connections:
- Launch the server machine’s terminal. You may either type “terminal” into your search engine or hit CTRL + ALT + T on your keyboard.
- Type in
ssh localhost and hit enter
- The response will resemble this for systems without the SSH server installed:
username@host:~$ ssh localhost ssh: connect to host localhost port 22: Connection refused username@host:~$
If the aforementioned is true, you must set up the OpenSSH server. The terminal should remain open, and
- To instal the SSH server, execute the following command:
sudo apt-get install openssh-server ii.
- When prompted, enter your superuser password.
- After the disc space prompt, press Enter and Y to let the installation proceed.
By entering the following command, you can determine whether the SSH server is operational on the workstation after the necessary support files have been installed:
sudo service ssh status
If the SSH service is now functioning properly, the response should appear in the terminal something like this:
username@host: sudo service -$ SSH status: OpenBSD Secure Shell server (ssh.service)
Vendor preset: enab; loaded: loaded (/lib/systemd/system/ssh.service; enabled
Being active (running) since Fri Mar 12 10:53:44 CET; 1 minute and 22 seconds Method: 1174 /bin/kill -HUP ExecReload (code=exited, status=0/SUCCES) $MAINPID
PID Main: 3165 (sshd)
Run the ssh localhost command once more in your terminal prompt to see if the OpenSSH server is configured correctly and will accept connections. When you run the command for the first time, the result will resemble this screen:
$ ssh localhost username@host
It is unable to confirm the legitimacy of host “localhost (127.0.0.1)”. SHA256:9jqmhko9Yo1EQAS1QeNy9xKceHFG5F8W6kp7EX9U3Rs is the fingerprint of the ECDSA key. Are you certain you want to keep chatting (yes/no)? yes
Warning: “localhost” (ECDSA) has been permanently added to the list of known hosts.
username@host:~$
Enter yes or y to continue
Congratulations! You’ve configured your server to accept requests for SSH connections from other computers using SSH clients.
TIP
You can now modify the default port for SSH connections by editing the SSH daemon configuration file, for instance. Run the following command at the terminal prompt:
sudo nano /etc/ssh/sshd_config
Please be aware that you must use the following command to restart the SSH service each time you make changes to the sshd config file
sudo apt-get install nano
The editor of your choice will open the configuration file. In this instance, Nano was used.
sudo service ssh restart
Run the following command to install Nano if necessary:
Please be aware that you must use the following command to restart the SSH service each time you make changes to the sshd config file:
How to Use SSH to Connect
Now that every machine you require has the OpenSSH client and server installed, you can connect securely to your servers from a distance. To do this:
- Run the following command after opening the SSH terminal on your computer: SSH to “your username@host ip address”You can simply type: ssh host ip address and press Enter if the username on your local machine and the one on the server you are trying to connect to match.
- Enter your password after you’ve typed it. Keep in mind that when typing, there won’t be any feedback on the screen. Make sure your password is securely stored and not in a text file if you are pasting it.
- A server will ask you if you want to keep connecting when you connect to it for the first time. Just Enter yes after typing it. Given that the remote server is not recognised on your local PC, this notice only occurs this time.
- You have now inserted an ECDSA key fingerprint and are connected to the distant server.
It is recommended to utilise the private IP address rather than the public IP address if the machine you are attempting to remotely connect to is also on the same network. If not, you must only utilise the public IP address. Additionally, confirm that the port forwarding settings are accurate and that you are aware of the correct TCP port that OpenSSH uses for connection requests. If no changes were made to the configuration in the sshd config file, the default port is 22. You might also simply follow the host IP address with the port number.
The connection request using the OpenSSH client is demonstrated below. We will also mention the port number:
Phoenixnap@185.52.53.222’s username at the machine is: $ ssh phoenixnap@185.52.53.222 -p7654.
It is impossible to confirm the legitimacy of host “185.52.53.222 (185.52.53.222)”. SHA256:9lyrpzo5Yo1EQAS2QeHy9xKceHFH8F8W6kp7EX2O3Ps is the fingerprint of the ECDSA key. Are you certain you want to keep chatting (yes/no)? yes
Warning: “185.52.53.222” (ECDSA) has been added permanently to the list of known hosts.
username@host:~$
Now that you have a terminal, you can manage and control a distant machine. If you experience connectivity issues with a remote server, confirm that:
- The remote computer’s IP address is accurate.
- There are no firewall restrictions or erroneous port forwarding on the port the SSH daemon is listening on.
- Your password and user name are both valid.
- The SSH programme has been correctly installed.
SSH Additional Steps
We strongly advise taking a few further measures to increase SSH security when you are able to access to your server using SSH. If you leave the configuration at its default settings, your server is more vulnerable to hacking and might be easily the target of automated attacks.
Some tips for strengthening SSH through modification of the sshd configuration file include:
- Change the default TCP port where SSH daemon is listening. Change it from 22 to something much higher, for example 24596. Make sure you do not use a port number that is easy to guess, such as 222, 2222 or 22222.
- Use SSH key pairs for authentication when logging into SSH without a password. They both make logging in without a password possible and are safer (which is faster and more convenient).
- On your server, disable password-based logins. If your password is cracked, it will be impossible for anyone to access your servers. It’s crucial to confirm that key pair-based authentication is operating properly before you remove the password login option.
- Disable root access on your server and switch to the root user by using a regular account using the su – command.
TCP wrappers can be used to regulate connections from IP addresses and domain hostnames. Configure which host can connect using TCP wrappers by editing the Etc hosts.allow and Etc hosts.deny file.
Keep in mind that permitted hosts take precedence over rejected hosts. To grant SSH access to a particular host, for instance, you must first refuse access to all hosts by adding the following two lines to the etc/hosts.deny file:
sshd : ALL
ALL : ALL
Then, add a line containing the allowed hosts for the SSH service to etc/hosts.allow. That could be a hostname, a set of IP addresses, or a single IP address: 10.10.0.5, LOCAL; sshd
Make sure to apply security at several tiers and to keep your log-in information secure at all times. Use a variety of techniques to restrict SSH access to your servers, or use services that will prevent anyone from brute-forcing their way in. One illustration of such a service is fail2ban.
SSH Over VNC
Connections can be fully encrypted via SSH tunnelling for users accustomed to working in a graphical desktop environment using Virtual Network Computing (VNC). Run the following command in the terminal on your Linux or UNIX workstation to tunnel VNC sessions over SSH:
$ ssh -L 5901:localhost:5901 -N -f -l username hostname_or_IP
Here is the breakdown of the command above:
- SSH: This initiates the SSH client software on your local machine and permits a secure connection to the remote SSH server.
- The command line option -L 5901:localhost:5901 instructs the local machine to redirect the client’s local port to the specified host and port on the remote system. In this instance, the local client’s port 5901 is being forwarded to the same port on the specified distant server.
- -N: tells not to run a remote command but merely to forward ports.
- -f : sends SSH to background after the password is provided, just before the command is executed. Then, you can freely use the terminal to type commands on the local machine.
- The username you enter here will be used to log into the remote server you specified with the option “-l username”.
- This is the distant system with a VNC server, identified by hostname or IP. 172.16.0.5 is an example of an IP address, while myserver.somedomain.com is an example of a hostname.
Using PuTTY on a Windows computer, you may also establish an SSH tunnel connection to a distant server. During configuration of PuTTY

- Click Connection, SSH, and Tunnels.
- .Type 5901 in the Source port field.
- Type localhost:5901 in the Destination field.
- The SSH session should be started as usual.
- Using a VNC client of your choice, connect to your server.
Describe RDP.
Microsoft created the Remote Desktop Protocol (RDP) as a protocol. It is used to remotely control and manage computers running the Windows operating system.
In contrast to Secure Shell, connections made using an RDP client give a user access to a graphical user interface that lets them access and control a remote computer much like they would their own.
Network and system engineers can quickly control remote computers connected to a local network or the Internet by using Remote Desktop services, formerly known as terminal services.
It costs money to get this. Since you are directly connected to the internet when using RDP, it is much less secure than SSH if you do not use a virtual private network (VPN). Numerous automated scripts are continually scanning your connection for flaws, especially if Windows Remote Desktop connections use open ports. In that scenario, having strong, safe passwords and changing them frequently are strongly advised. Although less vulnerable, this does not make RDP connections safe.
What Is the Process of Remote Desktop Protocol?
Windows Remote Desktop connection uses the Remote Desktop Protocol and is based on a fairly straightforward client-server approach (RDP). The Windows Remote Desktop server-side service begins accepting connection requests on port 3389 as soon as you enable it. You must always enter a correct username for the account you are using to log in remotely whenever you attempt to connect to a Windows server. You can administer applications, move files between the two machines, and essentially carry out any job you can carry out locally with the relevant account once you have access to the server.
Since the Remote Desktop client is by default available, you can create a secure remote connection to another computer regardless of the version of the Windows operating system you use. However, a machine can only be accessed remotely if it is running Windows in the Pro, Enterprise, or Server editions. Therefore, we can draw the conclusion that RDP connections are only possible between devices running the Windows OS.
Activating an RDP Connection
You must enable the Windows Remote Desktop server service in order to connect remotely to another machine across a network. Since the Remote Desktop client is built into Windows PCs, it is available right out of the box and does not require any further configuration in order to connect to another Windows-based machine. On all Windows OS versions, accepting Remote Desktop connections from other PCs is, however, disabled by default.
Before enabling this service, you should bear the following in mind if you intend to connect remotely to a server over the Internet rather than the local network:
- Forwarding ports – If a VPN is not being used, you must ensure that the ports are correctly forwarded to the IP address of the remote host. If you want to connect to a remote server using the Remote Desktop Protocol, port 3389 is the default TCP port for that purpose. To be sure this is the case, check your router’s settings. Keep in mind that your Windows server is susceptible in this scenario because it is accessible to the Internet directly.
- With a VPN– This is a much safer method of connecting to Remote Desktop. You can access any services that are only available while using a local connection when you set up a virtual private network on a client computer.
- Firewall parameters– Verify that the distant machine’s firewall is not preventing Remote Desktop connections. Regardless of whether it is the default or a custom port number, you must open the local port for RDP.
In Windows 7, 8, 10, and Windows Server versions, you can enable remote access.
For all Windows operating system versions, the process for configuring remote desktop and enabling secure remote connections to a server or a PC from another computer is the same. I’ll outline the fundamental procedures for enabling remote access to a desired machine. Please ensure that you have considered the above recommendations regarding port forwarding, VPN settings, and firewall configurations before proceeding.
Step1 Permitting remote connections
To authorise remote connections, access the computer information for that device.
- Right Depending on the Windows OS version, click either Computer or This PC.
- Select Properties.
- On the window’s left side, click Remote settings.

- Right Depending on the Windows OS version, click either Computer or This PC.Select Properties.On the window’s left side, click Remote settings.

Step 2:Users Can Be Added To The Remote Users List
Only if you wish to grant users other than administrators access to the computer in question do you need to complete this step. If you are an administrator, your account will be added to the list of permitted users automatically, but you won’t be able to see it. To pick more users:
- Click Select Users on the remote settings screen that is displayed above.
- In the Remote Desktop Users box, select Add.
- The box for selecting users will display. By clicking on Locations, you can choose the location for your search.
- Enter the user’s name in the field labelled “Enter the Object Names to Select” and then click “Check Names.”
- Select the user account after you’ve found a match, then click OK.
- By clicking OK once more, the System Properties window will close.
There aren’t many additional settings that may be altered in Remote Desktop configuration. You can now login to and control this machine remotely, provided that additional settings do not obstruct your Remote Desktop connection.
How to Use the Desktop Connection Client Removal Tool:
You do not need to specifically configure Remote Desktop on the local computer in order to use the Remote Desktop client. Beginning with Windows 7, the methods listed below will function with every version of Windows.
Step 1:Activate the Desktop Connection Unit.
You need to find the Remote Desktop Connection program on your local Windows machine. It can be located in a few distinct places:
- To access Remote Desktop Connection in Windows 7, go to Start -> All Programs, choose the ‘Accessories’ folder, and then click on it. The Remote Desktop Connection app may be found in the Windows Accessories folder, which can be found by clicking Start in Windows 10 and then selecting the Start button.
- Type Remote Desktop Connection into the search box after clicking on Start. As soon as you begin entering, search results will be displayed. When the program appears on the list, click it.

3.On your keyboard, press Windows + R to bring up the “Run” box. To launch the Remote Desktop client, enter mstsc in the “Open:” area and press Enter.

Step 2:Enter the IP address or name of the remote hosts.
You will be presented with a window after starting the Remote Desktop Connection application where you can type in the name or IP address of a remote computer you wish to access.
Enter the relevant name or IP address in the Computer area, then click Connect.

You may need to specify the remote host’s private or public IP address, depending on your specific situation. The potential outcomes are as follows:
- You will utilize the host’s private IP address for Remote Desktop Connection if the client computer and the remote host are connected to the same Local Area Network.
- You will utilize the remote host’s private IP address for Remote Desktop Connection if you are connecting to it via a virtual private network (VPN) on the client computer.
- You will utilize the public IP address if the client computer is connecting to the remote host from another network via the Internet without a VPN
How to Locate the Host Name and IP Address
Finding the name or public or private IP address of a computer where you wish to configure Remote Desktop service is possible in a variety of ways. Here are the simplest and quickest approaches:
To determine a computer’s private IP address:
- The command prompt can be opened by typing CMD and pressing Enter or by searching for CMD in the start menu or by pressing Windows + R on your keyboard.
- At the command prompt, type ipconfig and press Enter.
- The private IP address of your computer will be displayed below the IPv4 Address line.

A computer’s public IP address can be found by:
- Visit com from your computer browser or look something up there.
- Simply enter “what is my IP” or “my IP” and press Enter.
- Google will display the public IP address that your machine is utilising at the top of the page. If this doesn’t work in your area, go to the first page that appears in the search results, and it will display the IP address. You may also view your private (local) IP address on some websites, like www.whatismyip.com.
To find a computer’s name:
- Depending on the version of the Windows operating system you are running, right-click Computer or This PC.
- Click on
- The “Machine name, domain, and workgroup settings” section will show your full computer name.
Step 3: Making the connection official by entering the RDP credentials
The loading bar will show following your click on connect. When the remote session has been initiated and configured, a pop-up window similar to this one will appear:

- Enter the chosen username’s password. If necessary, you can use a different account and enter a different username and password.
- When ready, click OK to dismiss the security certificate warning.
- Select Yes to proceed.
The distant computer’s desktop won’t be visible to you. You can now do any operation that you can while working immediately in front of it, subject to the user account authorization settings.
Remote Desktop Protocol Further Steps
It’s crucial to take security measures when configuring your remote server or workstation to accept remote desktop connections. If you are using the Internet to access your server, it is particularly open to attack.
If you connect to your PCs remotely via the remote desktop protocol, bear the following tips in mind:
- Use your Windows computer’s built-in VPN server to further safeguard your traffic. Access to your Windows server and services will be made more secure as a result.
- Set the level of client connection encryption. By default, this option is set to “Not configured.” All communications between clients and Remote Desktop Session Host servers can be forced to use strong encryption levels if you enable this feature. The “Client Compatible” encryption level setting is not something we advise using. If you leave the default “High” encryption level setting, all data sent from the client to the server and vice versa will be strongly encrypted using 128 bits. The Local Group Policy editor can be used to modify this setup.
- Use a third-party tool, such as Duo Security, to implement two-factor authentication. You can add two-factor authentication to all Windows login attempts or just RDP sessions by installing Duo Authentication for Windows Logon.
- Apply firewall rules to restrict the amount of open RDP ports that are accessible to the Internet, especially if you use the standard RDP TCP port 3389. You may access Windows’ built-in firewall from the Control Panel and further customise it to limit traffic to particular ports and IP addresses.
You can further restrict remote desktop access by using these recommended practises for enhanced RDP security. Without spending a lot of effort configuring your machines, you can prevent the majority of fraudulent login attempts.
Conclusion
The majority of users and most Linux and Windows operating system versions will be able to use the procedures and actions specified in this guide.
Now, either Linux or Windows should be able to connect to a remote server.
Of course, there are many other ways to connect two distant computers, but the ones discussed here are the most typical
Read Our Next Articles Cost And Requirements For Making Money

by Sanjana Shruti | Dec 26, 2022 | Uncategorized

The computer game Minecraft holds a unique place in the hearts of gamers everywhere because it is one of the most well-known and often played games of all time. The game’s pixel-based graphics, captivating and inventive gameplay, and committed development in additional upgrades have made it an increasingly well-liked multiplayer gaming alternative well into 2023. With further improvements and material planned for the game by Mojang, the popularity of Minecraft and its seemingly continuous stream of multiplayer sessions do not appear to want to slow down anytime soon .The game’s enormous success has also directly contributed to its monetization by gamers who now generate income via Minecraft servers. Making money with Minecraft can be done in a variety of ways. The most effective of these ways to make money is by running your own profitable Minecraft server. However, a lot of users frequently overlook this chore and ruin the creative process. To make up for the initial investment and turnover profit, I will first discuss the prerequisites and the typical cost of a Minecraft server in this article before moving on to how to earn money with Minecraft.
Server Requirements For Minecraft:
The first step is learning about the fundamental and important criteria of a Minecraft server if you’ve given it some thought and want to start your own server. The hardware that you choose to use is the most crucial of these hardware selections. Each server is made up of hardware components that are essential for processing the game’s content when played online.
In general, there are two major ways to host Minecraft. The first is utilising your own computer, which will demand more hardware. This approach is not very effective because the resources will be diverted from the game hosting process to other activities that will use valuable resources. Additionally, there are several physical restrictions on the amount of hardware that can be installed on a PC.
A dedicated remote server is used in the second technique. Because your Minecraft server will only be hosted on this dedicated server, your costs will go down and the effectiveness of your hosting will skyrocket. You may estimate the cost of a Minecraft server by calculating these criteria.
RAM For A Minecraft Server:
RAM is one of the two hardware elements that will have the most impact on the gameplay experience on your Minecraft server. In order to prevent lag or stuttering for players, you must ensure that your online Minecraft world has adequate RAM to handle calculations. It’s definitely not what you want for the server to crash as a direct result of RAM exhaustion in some circumstances. As far as RAM requirements go, you may launch a Minecraft server with just one GB as long as your server is just utilised to host Minecraft. However, a minimum of 6GB RAM is advised if you wish to execute regular backups and other fundamental server operations. If you need assistance figuring the RAM amount to establish your Minecraft server fee, you may follow our method to determine the necessary quantity with ease. This number will increase as more players join in
CPU for A Minecraft Server:
The other crucial component of hardware that need special attention is the server processor, or CPU, which has even more intricate implications for the performance of your Minecraft server. The amount of processing power you require closely correlates with the number of people and events on your Minecraft server, much like RAM does. If you want to earn money in Minecraft, a good CPU unit is a need. A Pentium 2.0 GHz processor can do the trick if your server is solely intended for hosting games with friends (1–5 participants), but a server with 20 players or more will require a potent Intel Core I7 or AMD Ryzen 7 CPU. Calculating the precise amount of CPU you require can be time-consuming and complicated, so read our in-depth article on selecting the finest server CPU instead.
OS For Minecraft Server:
To configure and operate the server through it, your server must have an OS. MacOS, Linux, and Windows—the three main desktop operating systems—are all supported. Linux OS is preferable to Windows, even though Windows arguably needs the fewest third-party apps and add-ons to run a Minecraft server. Although UNIX is required to host through Linux, it is considerably simpler to operate the server due to the general interoperability with Linux distros like Ubuntu. As a last benefit, Linux distros also use a lot less server resources, which results in a little bit greater efficiency.
Domain For Minecraft Servers (Optional):
Your user base will be able to connect to your Minecraft server even if you don’t have a domain name for your access address. However, it is imperative to have your server’s name displayed as often as possible, along with your server address, in order to properly sell and advertise your server. The ability to use your server name as part of the server address and substitute your Minecraft server’s generic IP address with that name is made possible by having a domain, which will greatly aid in your ability to market and recruit new players to your server.
Costs Of A Minecraft Server:
How much a Minecraft server is worth is a frequently asked question here. The number of players who are actively playing on the server will determine how much your Minecraft server will cost. You will need to invest in more hardware as there are more players on your server to ensure that it operates as effectively as possible. This leaves the question of how much a Minecraft server costs open to interpretation. You might be able to host a small Minecraft server for you and a few buddies for free.
But when the number of people increases, it is commonly known that the cost of the Minecraft server will also exceed $100 per month once you have more than 700 players. Do you wish to reduce the price of your Minecraft servers? Or perhaps you think there is a lot more to learn about Minecraft hosting before deciding to use it. Visit our comprehensive guide on running a Minecraft server to learn more about what constitutes a well-optimized server as well as to see a list of the top 10 Minecraft server providers.
How To Get Rich Playing Minecraft:
Let’s go right to the point—making money on Minecraft—now that the conditions for launching a Minecraft server have been established. Some of these minecraft money-making strategies will directly involve the minecraft server you just set up. Others, though, will play complementary duties to your server and won’t be directly involved, though you can still utilise them to promote it and draw in more users. Here are 10 surefire ways to manage your Minecraft server costs and generate income from your server.
Tebex
Tebex will be discussed first since it is the only one of these solutions that isn’t a straightforward method of earning money using Minecraft. Tebex is an internet programme that you may connect to your game servers to manage the accounting portion of those servers. It provides you with a payment gateway so you may charge for the server, manages your accounts, offers statistics so you can figure out things like the cost of your Minecraft server, and aids in marketing and advertising your server. Even while it doesn’t immediately assist with earning money, the insight and efficiency flow helps you manage, operate, and monetize your server more effectively while also saving you time and effort. Tebex will cost you about 2% for each transaction in exchange for its helpful services.
Become a Partner in Minecraft
You can sign up for the Minecraft Partner Program if, in addition to being an ardent Minecraft player, you are also a designer and an online content provider. Naturally, Mojang Studios won’t accept every applicant. You will need to have an attractive prior work portfolio and résumé, as well as the ability to accurately respond to their queries. However, after you sign up, you may utilise their platform to sell a variety of items with a Minecraft theme. Items, cosmetics, texture packs, add-ons, servers, worlds, and much more.
Fee for Membership
The simplest way to make money on Minecraft to offset your initial investment and turn a profit is to charge a membership fee. You can make money off your Minecraft server using a variety of membership fee strategies. You can limit access to certain features or make the server solely available to paying users. But be aware that you will need to proceed gradually with this. If a new server tries to charge a membership fee right away, it won’t be successful because it has no reputation and few players. It’s preferable to hold off on adding a membership charge until you have a significant player base.
The Play Of Minecraft (Twitch)
Nowadays, the key to earning money from video games is streaming. Do you feel at ease speaking in front of the camera? Are you able to create engaging game content? Afterward, sign up for Twitch and launch your broadcasting career. There are numerous methods to generate money on Twitch. You can have the opportunity to become a Twitch Partner with its own rewards and advantages after a certain point. You can quickly amass a sizable sum of money from donations on YouTube if you build up a sizable audience. Being well-liked on Twitch is a great way to promote your server there and draw in new users.
Establishing A YouTube Channel For Minecraft
The king of online video content, YouTube, features gameplay footage of well-known games like Minecraft as a significant percentage of its most popular content. The benefit of running a Minecraft-specific YouTube channel is that you can create a significant amount of your material while playing and streaming on Twitch. The videos can be edited to better fit the YouTube interface before being posted. Another well-known medium where you may promote your Minecraft server is YouTube, where views from advertisements can generate large sums of money.
Obtaining Sponsorship
If your Minecraft server has a significant player base or is widely displayed on streaming websites like YouTube or Twitch, you may be able to exploit its exposure as a marketing tool for other companies willing to sponsor you in exchange for including their brand as part of your server. With this technique, you can make money on Minecraft without a server. But if you are well-known on video and streaming sites, you might consider creating your own server as a second source of income in addition to potential sponsorship opportunities.
Selling Accounts On Minecraft
As items that can be purchased and traded in the world of Minecraft, Minecraft accounts can be rather lucrative. Each account is valued on the market based on a variety of awards and parameters. But the main characteristics that characterise a Minecraft account’s worth are its cosmetic goods, uncommon records, achievements, and perhaps even its username, if it is uncommon enough. If you play consistently, you can keep creating new accounts, level them up, and then sell them for a profit. Selling your accounts will be simpler if you are already a member of the aforementioned Minecraft Parent Program.
Money For Minecraft
As the main method of Minecraft income, I have mentioned donations on Twitch. Since the server is presumably currently free for users, only a tiny percentage of them are likely to support you with donations in the early stages of your Minecraft server. You might list the cost of your Minecraft server as one of the reasons why you need donation support. Donations will lose their effectiveness as a monetization technique when the server grows and you add more membership fees because you will already be charging for the service.
Skincare From Minecraft
As was already mentioned, cosmetic items from Minecraft may be rather expensive. You may simply sell expensive Minecraft cosmetics for cash on several marketplaces if you have any. However, since you may make and sell your own cosmetics, this is only a portion of it. Additionally, you can create cosmetics that are specific to your server and charge users for them in accordance with a tier system. The players are not the only focus of cosmetics. You can produce texture packs and other appearance modifying packages, sell them, or use them to improve the appearance of your server to draw in additional players. A fantastic approach to lower the cost of your Minecraft server is to sell cosmetics on it.
Minecraft Products
When you have a sizable Minecraft server or presence, you should choose this option. Since Minecraft is the most played game of all time, it is simple to create and sell products inspired by this charming pixelated title. T-shirts, accessories, toys, pillows, and other creative objects can all be decorated with the distinctive Minecraft look before being sold. You can advertise the sale of these things on all the channels listed above and employ cutting-edge strategies like drop-shipping to reduce the cost of manufacture and shipping. You should have stopped worrying about the expense of your Minecraft server by this time.
Conclusion:
The enormous popularity of Minecraft presents a fantastic chance for gamers and tech professionals to make money. To make sure you get the most out of hosting your Minecraft server, there are pitfalls to watch out for along the route, just as with any other financial endeavour. Consider choosing VPS as your server if you’re wanting to reduce the cost of your Minecraft server while retaining quality.
Cloudzy provides low-cost, incredibly adaptable anti-DDoS gaming servers that are designed to run the most well-known games in the world in a multiplayer setting, like Minecraft. You can choose from a number of flexible billing options and payment options, and the servers support over 15 global locations created to provide the lowest latency for players from across the world! With Cloudzy, you may begin your adventure to reduce your Minecraft server costs and earn money playing the game.
FAQ:
How Do I Become a Partner in Minecraft?
To participate in the official program you must apply, and the requirements for acceptance typically centre on your prior résumé and portfolio as a content developer and designer. Once you’ve been approved, you can start making money by selling your minecraft content.
Should My Minecraft Server Have Mods?
Consider reinvesting some of your profits to pay moderators to ensure that no one cheats and that the server works according to order once the player population of your server reaches an untenable level for one person.
What Does a Minecraft Server Cost on Average for 100 Players?
Nearly 10 GB of RAM and a respectable CPU would be needed for a server with 100 active players, costing about $25 per month.
Read Our Next Articles Linux Vs Windows

by Sanjana Shruti | Dec 24, 2022 | Uncategorized

Over the past ten years or more, IT infrastructure has undergone a transformation. Businesses have modified how business-critical workloads are managed, provided for, and housed within the infrastructure as a result of the growth of virtualization.
With the introduction of virtualization, it is now possible to run many software programmes on a single piece of physical hardware as opposed to arranging a server’s workload 1:1, with a single workload per physical server.
Virtualization has enabled businesses to more efficiently and effectively take use of improvements in CPU processing power across all domains, as well as improvements in network, processing, and storage capacity.
However, there are some circumstances when a physical server might still be required for specific activities. Let’s look at the main differences between a virtual machine and a physical server.
How do physical servers work ?
An extremely well-known and long-standing element of the IT infrastructure is the physical server. A physical server is an item of equipment that you can touch.
One could refer to a typical server as “bare-metal.” It typically consists of all the hardware parts that make up the physical server’s chassis and enable its functionality.
An operating system can be loaded from the internal storage system, RAM, and CPU of the physical server before it is launched. It may or may not have general-purpose storage in addition to the storage needed to execute the OS.
The server is connected to you physically through the data centre. This covers storage connections, network and power connections, as well as other hardware and auxiliary gadgets.
When you consider bare-metal servers that may support a single application, they often provide the data and software needed by only one “tenant.” A tenant can be thought of as an individual customer or consumer.
A single user’s instance of software and infrastructure is represented by one tenant. Customers often have their own unique physical hardware dedicated to servicing their resources in a single-tenant system.
servers of various sorts:
Although you might think of physical servers as a piece of technology that “fits all,” there are several types, sizes, capacities, and uses that call for physical servers.
- Tower Servers: Compared to their rackmount or modular equivalents, it is typically less expensive and less powerful. Where server racks may not be available or where there may not be another rackmount device to warrant purchasing them, they are frequently encountered in fringe or small business locations.
- Rackmount Servers: When you think of an enterprise data centre, standard servers come to mind. Rackmount servers are those servers, and they are housed in racks that are typical for servers.
- Server rack HP Proliant DL580: Since they are typically able to set up or increase the capacity of the storage, compute, and network by simply placing the most recent “server blade” or “module” within the chassis of the HCI/Modular server, these servers are frequently referred to as “blade” servers or even hyper-converged forms factors.
- Dell PowerEdge MX: Just a few of the several server kinds you can buy are those that were previously stated. The aforementioned sorts are the most typical physical forms that can be found in a company’s data centre
What Is VMs?
The most common type of IT infrastructure employed in contemporary settings is virtual machines. Virtual machines are still in use as the technology of today’s virtualized environment, despite containers’ growing popularity.
Installing a hypervisor on top of a “bare-metal” server allows for the creation of virtual machines. Popular hypervisors today, like VMware vSphere or Microsoft Hyper-V, frequently take the method of simulating the hardware on the underlying physical server before exposing this computerised system to operating systems.
A CPU scheduler or other device that manages requests from operating systems running in guest virtual machines, which are connected to the physical CPU installed on the physical host hosting it, is often included in the hypervisor.
In terms of management, provisioning, configuration, and even automation, virtual machines have a number of advantages over physical servers. A virtual server is often set up in just a few minutes and in some circumstances, minutes, while a physical one can take weeks or days to obtain, provide, and configure the machine.
Flexibility is impossible when using real servers, but because the virtual machine is decoupled from the physical hardware, it can relocate.
When a virtual machine is running, it can be easily moved between different hosts since virtual machines are collections of shared files rather than physical hardware, which makes it simple to move them around and change who owns their computers and memory.
Physical servers are typically suited for a single consumer or tenant, as was previously indicated. By their very nature, virtual machines are better suited to multi-tenant setups, where numerous businesses may use different virtual machines located on a single physical server or group of hosts for hypervisors.
Various Types Of VMs?
The virtual machine has no actual framework that you can get your hands around. There is the theory that the VM can use “virtual hardware.”
Consider VMware vSphere as an example. You can see the virtual hardware that makes up your virtual machine when you look through the VM settings. At least one CPU, memory storage, and network will be present.
The VMware virtual machine includes virtual hardware. Beyond the virtualized hardware, there are various VM types to be aware of:
- Persistent- Usually, VDI environments are used in conjunction with it. It speaks about a virtual machine that is neither terminated or destroyed after use.
- Non-Persistent- primarily involving VDI setups. It refers to the features of a virtual machine (VM), which exists just momentarily and is only produced when it is required.
- Storage with thick provisioning– By having it “zeroed” off when the VM was created, the storage for the VM is described.
- Thin Provisioned Disks- Only when more room is required may these be cancelled out. Since you can assign virtual machines (VMs) more storage space than you can access, this enables “overprovisioning” in storage.
- Online Appliances- OVA or VF templates can be used to deploy virtual appliances that are a part of VMware vSphere. As a result, providing an appliance is incredibly quick and easy.
- Vipps– A vSphere concept called logical grouping enables virtual machines to be managed as a single unit.
- Hyper Generation 1– The original VM configuration is V. The “generation” often has an impact on the VM’s features and capabilities. Unlike Generation 2 VMs, Generation 1 VMs have less capabilities.
- Generation 2 – It is the most sophisticated VM configuration that Hyper-V offers, and it includes all of the most recent features and capabilities.
Comparison of real servers VS virtual machines:

Understanding the differences between a physical server and a virtual server requires a more thorough analysis of all of their components.
Performance:
When your business is dealing with a massive amount of data that needs to be processed regularly, you should take this element into account.
Physical servers are better and more effective than virtual machines (VMs), which are more likely to experience performance problems as a result of an excess of virtual servers inside the physical system.
As a result, while having similar hardware and software resources and capabilities, a physical device and a virtual computer cannot perform at the same level. The physical server is the best choice if your company engages in activities that require computers to the fullest extent.
Management:
In terms of management, VMs are significantly simpler to handle than physically based servers. It could take several days to restore the physical server to its original state if a server crashes. With the most recent software for VM backup, the restoration procedure for virtual machines may be started with just a few clicks.
The physical server should also be thoroughly checked for flaws before use, and the driver should be installed and configured if necessary.
However, since VMs are pre-built on physical hardware and ready for use, this is different from the case with them. As a result, VMs can be created and turned on in under a minute.
However, operating a server virtualization environment calls for a great deal of knowledge and particular skills. Therefore, make sure your IT team is capable of managing the virtual infrastructure.
Portability:
The mobility of physical servers and virtual servers is one of their main differences. Virtual machines (VMs) can be readily moved from one physical server to another and from one virtual environment to another.
A virtual machine (VM) is hardware independent since they are isolated from one another and have their own virtual hardware. More work is required to move the physical setup of your server.
Scalability:
In order to expand your physical server, you must buy pricey hardware components that might be expensive and include a time-consuming installation process. However, the environment of a virtual server enables on-demand scaling.
Multiple virtual machines (VMs) can be hosted on a single virtual server, which you can add or remove with a mouse click. The virtual environment can be scaled up or down based on how your company’s demands change over time. In this case, ensuring VM deployment does not need the acquisition of any additional hardware.
This is so that computing resources can be shared equally among all VMs running on the host, which has the same resources for all VMs. This implies that you can design a flexible environment that can handle jobs of any complexity.
capacity control:
Physical servers’ 25 percent moderate production capacity requires that they be operating at full software and hardware capacity. As a result, a sizable amount of computing resources are still in use, which is not economically advantageous.
The underutilised resources will be handled by servers hosting numerous VMs by allocating them to the VMs that need them the most. By doing this, it is possible to control capacity in the best possible way.
system restoration:
Let’s say an accident or natural disaster affects the producing plant. In that circumstance, it is essential to swiftly restore information and operations that are essential to the system in order to reduce system downtime and lessen the negative effects on the organisation.
Businesses that use physically situated servers may need to wait hours or even days to resume operations. This disaster recovery (DR) technique involves the following in this case:
- on a real machine, adding a new server.
- Installing an OS.
- putting the applications together.
- restoring important data backups.
Within virtual environments, the DR process is easier. Using previously created VM backups, the entire VM may be restored using a DR site with essentially no downtime.
Continuity in business:
Nowadays, businesses must operate continually, and even a small lapse in productivity could have significant repercussions.
Thus, one of every company’s main goals should be to ensure business continuity, especially in the event of a catastrophe.
Virtual machines (VMs) are clearly more tolerant to failure as compared to actual servers. To ensure minimal downtime in the event of a disaster, the load in your virtual environment can be moved with a few clicks to another website.
You can move your workload back to your main location once the catastrophe’s effects have been mitigated and your production centre has been rebuilt.
In general, the effects are probably irreparable if a catastrophe has damaged or destroyed the physical system of your server.
Security:
In a virtual environment, security management can be modified more easily than in a physical one. If you have physical servers, you must design security mechanisms for each one in line with its resources, computing power, and the sensitivity of the data it houses.
If the IT system you’re utilising is composed of at least 10 actual servers, this task will take a while. A broad security system, however, protects a virtual environment.
As a result, the supervisor’s dashboard can be used to design, document, and apply security rules and procedures.
Costs:
An actual server’s construction and upkeep might be very expensive. This is a result of regular software and hardware updates, frequent system failures, and even the failure of expensive to maintain or replace equipment and computer components.
Virtualization, however, is the ideal choice for businesses with many of servers. By distributing computing resources among the active VMs in virtual server environments, customers can get the best performance at the lowest possible cost.
But it’s crucial to remember that software licencing for virtual machines can be highly pricey as well. Your virtual environment’s size will determine the price, which can range from $1,000 to $10,000.
How may backup and replication be used to protect your virtual machines?
As we’ve already indicated, adding third-party data security software can improve the security of your virtual machines. Backup & Replication is the ideal solution to accomplish this.
It offers replication and backup that is image-based, application-aware, and compatible with VMware, Hyper-V, and AWS EC2 environments. Numerous new capabilities that are beneficial to your virtual machines have been added to Backup & Replication. Let’s examine the features in more detail.
Benefits of replication and backup:
Smaller storage space:
Backup & Replication uses native change-tracking technologies like change-based Block Tracking (CBT) for VMware and Resilient Change Tracking (RCT) for Hyper-V to significantly reduce the amount of storage space required.
These tools let you identify the information that has changed since your most recent duplicated backup and then only add the most recent data to this backup database.
Backup & Replication makes it possible to delete swap files or partitions from VM backups. Additionally, the storage space won’t be filled to the brim with duplicate copies of data thanks to the built-in tools for data compression and deduplication.
Deduplication ensures that only significant data blocks are stored, whereas compression can shrink the size of every data block. Deduplication and compression options are automatically activated when you set up a new backup repository.
Increased data transfer speed:
In addition, Backup & Replication offers LAN-free data transmission through its Hot Add and Direct SAN Access features.
You can instal virtual machine snapshots and access virtual machine files directly through the VM datastore using the Hot Add functionality, bypassing the host’s IP/TCP stack.
You can directly access VM files stored on a SAN storage device utilising an iSCSI fibre connection by employing this mode, known as Direct SAN Access mode.
You may significantly speed up data transfers and lighten the load on your production network by using these transport types.
The network can be utilised to its fullest potential through data compression and traffic reduction to promote quicker VM recovery and accelerate replication and backup processes.
Advanced bandwidth throttling is an additional tool for accelerating data transmission. You can configure speeds for tasks executing in the virtual environment with bandwidth restrictions.
As a result, LAN/WAN bandwidth usage is reduced. Additionally, you can design several timetables for the application of throttle regulations. You can manage the network traffic with this capability.
Automated recovery from disaster:
Backup & Replication now offers Site Recovery in addition to replication and backup operations.
This DR process has been greatly simplified by the site recovery feature. With the help of this functionality, you can create workflows for site recovery that could contain a variety of occurrences and circumstances and be arranged however you choose.
This enables you to develop an automated system that depends on the DR plan and may be as complicated as you like. It is possible to design site recovery procedures that can be used in a variety of situations, including data centre transfers, scheduled failovers, emergency failovers, failure backs, and more.
Once the initial settings have been made, a site-recovery job can be finished with a few clicks. Therefore, you may focus on other issues that come up during the DR event as you won’t need to maintain track of the DR process.
The Secret to Unwavering Reliability:
An efficient data protection solution, Backup & Replication has various security-related features. Self-Backup, one of these capabilities, offers automatic security for the setups you’ve already put in place.
You can rapidly install a new copy of the program that runs Backup & Replication and then restore the configuration of your system (job settings, configurations backup history, inventory, etc.) via the self-backup if, for example, the VM running the program is damaged or deleted. Daily self-backups are performed, and the data from those backups is forwarded to the backup repository.
A snapshot verification capability that will take OS screenshots of recovered VM tests of VMs can also be enabled. This will provide you with crucial VM recovery proof needed to guarantee recovery success.
Additionally, Backup & Replication will guarantee the security of your data. It uses the widely used AES 256-bit encryption technique to safeguard virtual machine data as well as files and other data.
VM data transferred over the Internet is encrypted before being transferred thanks to Backup & Replication (encryption during flight). Encryption is used to safeguard the backup repository’s data storage repository for backups against unwanted access and hacker attacks (encryption in the rest of the data).
Conclusion of the Topic:

Although choosing between physically-based machines and virtual machines might be challenging, determining your business’ needs and objectives as well as assessing your infrastructure’s capabilities will be very beneficial. The introduction of virtualization has completely changed how companies run their operations.
While physical servers are still in use, virtualization provides several advantages and has grown significantly over time.
It is safe to say that setting up a virtual server environment offers your organisations a variety of advantages and opportunities based on the analysis presented in this blog post.
However, it would be great if you made sure to pick the server environment—whether virtual or physical servers—that is most advantageous for you and your business.
Many businesses are switching to hybrid systems because they enable the combination of the benefits of strong server hardware and virtualization.
Read Our Next Article About Introduction To VPS What They Are And How To Get Started
by Sanjana Shruti | Dec 23, 2022 | Uncategorized
Buying a computer for personal use or upgrading from an older computer to a new one can be difficult.
Additionally, it becomes more difficult because we need to learn more about the features and capabilities of the newest technology and operating system available on the market.
Windows and Linux are two of the most widely used products right now. There is no question about how well they performed
They are different from one another in terms of their features, goals, advantages and disadvantages, cost, etc. The decision is based on the most in-depth analysis of the two possibilities.
Concerning the operating system, there has been a long-running controversy between Linux and Windows. You must thoroughly examine both Linux and Windows to see which one best suits your needs before deciding between them for your computer.
This essay is meant to give you information about both from every angle. After reading this article, you’ll be able to evaluate each of the operating systems and decide whether to use Windows or Linux with confidence.
Also Read: Windows vs. Linux Hosting: Which Should You Pick?
Linux:

An operating system (OS) developed by the community for use on computers, servers, mainframes, mobile devices, and embedded devices is called a Linux operating system (OS). It is Unix-like and open-source.
It is compatible with a wide range of different platforms, including the x86, ARM, and SPARC family of computers, making it one of the most widely supported operating systems.
It’s crucial to remember that Linux OS versions control hardware resources, run and handle programmes, and give users some sort of user interface.
Due to the enormous development community and variety of distributions, Linux has a version for practically all tasks. Additionally, thanks to its sizable community and variety of distributions, Linux has a significant presence in many computing fields.
Without a doubt, Linux has become one of the most widely used operating systems in recent years for running web servers like Apache, network operations, scientific computing tasks requiring massive computational clusters, databases, desktop and endpoint computing, and operating mobile devices like Android OS. Linux OS VPS are available from
Window Hosting:

Hosting for Windows websites refers to hosting for websites based on the Windows operating system. A Linux version is available for practically all duties. Since the majority of the most popular web hosting plans run on Linux, it is usually assumed that when a web hosting provider doesn’t indicate whether their plan is Windows hosting or Linux hosting, you can presume it is Linux hosting.
However, there are certain website owners who will benefit more from Windows server hosting, so if you fall into this category, it’s critical to pick a hosting package that offers the specific capabilities you require. You can order a Windows OS VPS from TryRDP.
Difference Between Linux And Window Hosting:
Popularity:
In terms of popularity, Unix unquestionably takes the top spot. As of 2020, more than 71% of all websites on the internet are powered by Unix systems.
Linux, an open-source variant of Unix, is used by 42.8% of the top 50 most visited websites. At least one of the major Linux distributions is thought to power 33% of all websites, while other Unix systems including BSD, Darwin, Solaris, and Minix only power 0.1% of all websites.
It is safe to presume that those unidentified systems are either rather sophisticated Linux distributions or that they are not mentioned on the host websites. Most businesses continue to use Unix or Linux systems.
Technology:
It appears to be the biggest distinction between Linux and Windows hosting right now in terms of technology. Linux works with bespoke software and supports the majority of programming languages, whereas Windows operates and handles data with the aid of specific Microsoft software.
Linux servers employ MySQL as their database, whilst Windows servers employ MSSQL. The Microsoft ASP.NET framework, which is a key programming language used in Windows hosting, was developed by Microsoft.
Large organisations most frequently utilise Microsoft SQL Server and Windows Server Datacenter when creating their own servers for exclusive use.
If you are seeking for work in one of those industries or you think one of your future projects might include managing legacy projects from huge organisations in the near future, you might want to think about Windows hosting.
Additionally, Windows is the best option if you want to run programmes or MSSQL on your website or if you want to learn MSSQL or ASP.NET for a future job.
Customizablity:
Installing any Linux distribution on a server you own is the first thing you can do. You can only obtain a licenced version of Windows Server Datacenter with Windows.
Obviously, individuals who are just getting started won’t notice much of a change, but for those who are familiar with how Linux distributions are set up, this could be a fantastic opportunity to increase the efficiency of their servers.
Linux hosting provides a higher level of customization freedom. Numerous well-known website-building platforms, including WordPress, Drupal, and Joomla, operate on the Linux operating system.
It is possible that they will function similarly on Windows servers, although doing so will require some time and minor adjustments.
Since Linux supports ASP.NET more than many other open-source software, it is a better option than many of them for customising servers or websites.
Final Word:
You have two primary alternatives when selecting a web hosting plan for your company: Linux hosting plans and Windows hosting plans.
If you’re just starting out, you can choose incorrectly right away if you don’t understand what they are and how they vary. As a result, you might later encounter difficulties attempting to make your website function as you had intended.
Read Our Next Articles How To Connect a remote server using SSH or Windows